The Internet of Things (IoT) is a swiftly advancing technology that has the capacity to transform our interactions with the environment. It pertains to a network of physical objects such as devices, structures, vehicles, and other items that are equipped with sensors, software, and connectivity, enabling them to gather and communicate data. The uses of IoT are multifarious, encompassing domains such as smart homes, healthcare, and industrial automation.
A crucial necessity for IoT devices is a dependable and effective operating system that can manage real-time data processing and storage. This is precisely where Linux proves to be valuable. Linux is an open-source operating system that offers high customizability and adaptability. Its design prioritizes efficiency and lightweight performance, rendering it an optimal choice for IoT devices that have limited resources.
The aim of this blog post is to guide readers in constructing intelligent devices using Raspberry Pi and other Linux-based boards, which can be utilized for diverse purposes, such as tracking temperature and humidity in greenhouses or managing smart home lighting. Upon completing this post, readers will possess fundamental knowledge on configuring the system, connecting the components, writing code, and deploying the device. Regardless of their proficiency level, whether novice or advanced, this blog post will equip them with the necessary resources to initiate their own IoT device projects.
What is Board?

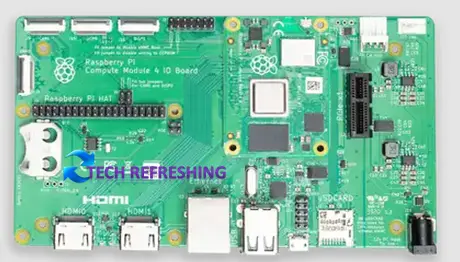
A board, in the context of IoT and embedded systems, refers to a physical circuit board that contains various electronic components, such as processors, memory, input/output (I/O) interfaces, sensors, and actuators. These boards are designed to be used as the foundation for building different types of electronic systems, ranging from simple projects like LED blinkers or temperature sensors to more complex systems like robotics, automation, and industrial control systems.
A board serves as a hardware base for executing software applications, and it is typically programmed via a selection of programming languages, such as C, Python, or Java. Various types of boards are accessible in the market, each having their unique characteristics, functionalities, and intended applications. Some commonly utilized board models in IoT projects comprise Raspberry Pi, Arduino, BeagleBoard and ESP32.
Choosing the Right Board

Picking the appropriate board is pivotal when constructing an IoT device. With a multitude of board models accessible, each with distinct merits and demerits, this section compares some of the most favored boards for IoT and explores the variables to contemplate when making a board selection.
Comparison of Popular Boards for IoT
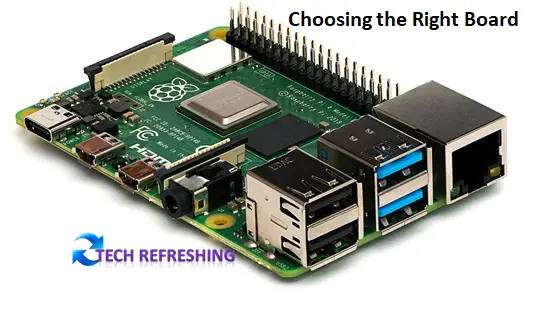
Raspberry Pi: One of the most popular boards for IoT applications is the Raspberry Pi. It is a popular single-board computer that is inexpensive and utilised for many different purposes. Raspberry Pi is a great choice for IoT devices that need data processing and storage since it has a strong processor, lots of RAM, and a variety of I/O ports.
Arduino: Another well-liked board for IoT projects is Arduino. It is a board containing a microcontroller that is made to be simple to programme and integrate with sensors and actuators. Because to its low power consumption, Arduino is perfect for gadgets that run on batteries.
BeagleBoard: The BeagleBoard is a high-performance board intended for cutting-edge Internet of Things (IoT) projects. It boasts a potent CPU, lots of RAM, and a variety of I/O ports. Although being more expensive than Raspberry Pi and Arduino, BeagleBoard has superior performance and processing capabilities.
Factors to Consider When Choosing a Board
When choosing a board for an IoT project, there are several factors to consider:
- Power consumption: It’s critical to pick a board with a low power consumption if the device will be battery-powered.
- Processor capability: The board should be able to meet the device’s data processing and storage demands.
- I/O ports: The board needs to contain a variety of I/O ports so that sensors and actuators can be connected.
- Price: The board should stay under the project’s allotted spending limit.
Why Raspberry Pi is a Popular Choice for IoT Projects
Raspberry Pi is a prevalent preference for IoT projects, owing to several reasons. Firstly, it has an economical price tag, making it feasible for budget-conscious hobbyists and developers. Secondly, it features a potent processor and abundant RAM, facilitating data processing and storage. Thirdly, it encompasses diverse I/O ports, streamlining the process of connecting sensors and actuators. Lastly, it has a vast community of developers and enthusiasts, facilitating easy access to online resources and support. In essence, Raspberry Pi is a flexible and robust board that suits an extensive spectrum of IoT ventures.
Setting Up the Environment

After selecting the board for your IoT project, the subsequent phase involves configuring the environment. This encompasses deploying the Linux operating system on the board, connecting to the board through SSH, configuring network settings, and installing requisite software and packages.
Installing the Linux Operating System on the Board
Prior to utilizing the board for your IoT project, it is imperative to install the Linux operating system. The installation procedure for Linux on a board differs based on the chosen board model. Nevertheless, most boards feature a collection of pre-constructed images that can be downloaded and installed onto an SD card. After acquiring the image, you can utilize a tool such as Etcher to flash it onto an SD card.
Connecting to the Board Using SSH
The next step is to establish an SSH connection to the board after the Linux operating system has been installed. A network protocol called SSH (Secure Shell) enables you to safely connect to a distant device via an unprotected network. You’ll need to be aware of the board’s IP address in order to connect to it via SSH. By using the ifconfig command while the board is connected to a keyboard and monitor, you can get this information. A built-in display on some boards, as an alternative, shows the IP address.
After you know the IP address, you can use an SSH client like PuTTY (Windows) or Terminal (Mac/Linux) to connect to the message board. Simply launch the SSH client, enter the board’s IP address, and then log in using the board’s username and password to connect.
Configuring the Network Settings
After successfully connecting to the board via SSH, the subsequent task is to configure the network settings by assigning a static IP address to the board to allow access over the network. Editing the network configuration file is essential for assigning a static IP address. The file’s location may differ depending on the board type and Linux version in use, but it is usually located in the /etc/network/interfaces directory.
Installing Necessary Software and Packages
To complete the environment setup, it is essential to install the necessary software and packages that match the IoT project’s specific requirements. The packages and software required may vary depending on the project needs. Nonetheless, some typical examples of packages and software that may need installation include:
- Python: IoT projects frequently use the Python programming language. It offers several libraries and modules for working with sensors and actuators, is simple to learn, and is versatile.
- Git: For maintaining code and working with other developers, utilise the Git version control system.
- MQTT: MQTT (Message Queuing Telemetry Transport) is a simple messaging standard used for interoperability among Internet of Things (IoT) devices.
You can use the package manager included with your Linux distribution to install these programmes and packages. For instance, the apt package manager can be used to install packages on a Raspberry Pi.
To start developing and deploying your IoT device, you need to set up the environment which includes installing the Linux operating system, connecting to the board via SSH, configuring network settings, and installing necessary software and packages.
Building the Smart Device
Once you have set up the environment, the next step is to build the smart device. In this section, we will provide an overview of a sample project (temperature monitoring system), explain the components needed, wiring the components to the board, writing code to collect data from the sensors and control the actuators, and testing the device.
Overview of a Sample Project
The exemplar undertaking we are examining is a temperature monitoring setup intended to gauge the temperature in a room and initiate a fan if the temperature surpasses a specific threshold. The configuration will comprise a temperature sensor (DS18B20), a fan, and a Raspberry Pi.
Explanation of the Components Needed
To build the temperature monitoring system, we will need the following components:
- Raspberry Pi: The temperature monitoring system will rely on the Raspberry Pi as its main processing unit, responsible for both acquiring data from the temperature sensor and managing the fan’s operation.
- Temperature sensor (DS18B20): The DS18B20 temperature sensor is designed to detect the ambient room temperature and transmit the gathered data to the Raspberry Pi.
- Fan: The fan’s operation will be under the Raspberry Pi’s control, switching on automatically to reduce the room temperature once it surpasses a predetermined threshold.
- Breadboard and jumper wires: The breadboard and jumper wires will be used to connect the components together.
Wiring the Components to the Board
The subsequent action involves linking the components to the board. To achieve this, we shall establish a connection between the DS18B20 temperature sensor and the Raspberry Pi utilizing the GPIO pins. Additionally, we will connect the fan to the Raspberry Pi, incorporating a transistor and a diode to safeguard the board against voltage surges.
Writing Code to Collect Data from the Sensors and Control the Actuators
After connecting the components to the board, the subsequent stage involves coding to gather data from the sensors and regulate the actuators. Python will be the language of choice for this venture. The program will retrieve temperature data from the sensor and scrutinize if it surpasses a predetermined threshold. If the temperature goes beyond the threshold, the program will activate the fan to lower the room temperature.
Testing the Device
The ultimate phase involves assessing the functionality of the device. To evaluate the temperature surveillance system, we shall execute the Python code and monitor the temperature readings while verifying whether the fan turns on when the temperature surpasses the threshold.
In general, the process of creating a smart device entails recognizing the required components, connecting them to the board, programming to gather data from the sensors and manage the actuators, and finally evaluating the device’s effectiveness. By adhering to these stages, you can create various IoT gadgets utilizing Raspberry Pi and other Linux-operating boards.
Deploying the Device
Once you have built your smart device, the next step is to deploy it. In this section, we will discuss how to set up the device to run autonomously, configure security settings, upload data to the cloud or a server for analysis, and scale up the project for larger deployments.
Setting up the Device to Run Autonomously
To enable the device to operate independently, you must configure it to initiate automatically upon power-up. This can be achieved by configuring a systemd service in Linux. A systemd service is a script that executes automatically when the device is activated. You can establish a systemd service that executes your Python code at startup, thus ensuring the device commences gathering data and regulating the actuators automatically.
Configuring Security Settings
When implementing IoT devices, security is an essential aspect that demands careful attention. To guarantee that your device remains secure and immune to potential attacks, you must configure appropriate security settings. Below are some of the security considerations to keep in mind:
Change the default password: It is advisable to modify the default password, as it is widely recognized and prone to easy guessing. Selecting a robust and intricate password that is challenging to crack is recommended.
Disable unnecessary services: Many IoT devices have unnecessary services running by default, which can make them vulnerable to attacks. You should disable any services that are not needed.
Update the software: Ensure that the device’s software remains current with the most recent security patches to prevent vulnerabilities.
Uploading Data to the Cloud or a Server for Analysis
Uploading the data collected by your IoT device to the cloud or a server allows for its analysis. Numerous cloud platforms and services cater to IoT, including AWS IoT, Google Cloud IoT, and Microsoft Azure IoT, among others. These platforms offer a range of tools for IoT data management, analysis, and visualization. With their help, you can store and analyze the data that your IoT device has gathered.
Conclusion
This blog post has covered the process of creating intelligent devices for IoT utilizing Linux, with a focus on Raspberry Pi and other boards. We have highlighted the advantages of utilizing Linux for IoT devices, including its open-source architecture, versatility, and significant community support. Additionally, we have delved into topics such as selecting the appropriate board, configuring the environment, constructing the device, deploying it, and expanding the project for larger implementations.
Leveraging Linux for IoT devices enables the development of potent, adaptable, and economical solutions for a diverse set of applications. Linux is an ideal fit for IoT devices due to its lightweight architecture, modularity, and diverse selection of programming languages and tools for developers. Furthermore, Linux boasts a massive community of developers and enthusiasts who freely exchange knowledge and expertise, simplifying the process of creating customized IoT devices.
Our suggestion is for readers to attempt the creation of their own smart devices utilizing Raspberry Pi or other Linux-based boards. By utilizing online resources, tutorials, and communities, you can acquire knowledge on building a variety of IoT devices, ranging from basic temperature sensors to more intricate systems such as home automation or industrial control systems.
To summarize, constructing intelligent devices for IoT using Linux is a captivating and fulfilling undertaking. With appropriate tools, resources, and community assistance, you can devise innovative solutions that have a positive impact on the world. We anticipate that this blog post has equipped you with valuable insights and motivation to commence your own IoT projects.


