A Beginner’s Guide to Using LibreOffice Writer: Creating Documents, Formatting Text and More
LibreOffice Writer is a free and open-source word processing program that comes as part of the LibreOffice productivity suite. It is a powerful and versatile tool for creating and formatting text documents and it can be used for anything from writing letters and reports to creating ebooks and manuscripts. Writer has many of the features and capabilities of popular commercial word processors like Microsoft Word, but it is completely free to use and can be downloaded on Windows, Mac and Linux systems.
Advantages of using LibreOffice Writer
LibreOffice Writer offers a major benefit in that it is entirely free to use, meaning that there is no requirement to pay for a subscription or license to access the software. Moreover, due to its open-source nature, users can download and customize the source code according to their requirements or contribute to its ongoing development.
LibreOffice Writer also provides a number of features that make it a great tool for creating professional-looking documents. You may adjust the text and style to suit your needs thanks to its many formatting options. In order to make creating and formatting documents simpler, it also has advanced capabilities like mail merge, document templates, and styles.
LibreOffice Writer is highly compatible with a diverse array of file formats, which facilitates the opening and editing of documents created using other word processors such as Microsoft Word. This quality empowers easy collaboration and document sharing with colleagues or other users who may be utilizing disparate software.
In this beginner’s guide to using LibreOffice Writer, we will cover the basics of using the software to create, format and finalize your documents. We will start with an overview of the Writer interface, then move on to creating and formatting text, paragraphs and pages. We will also cover styles and templates and provide tips for finalizing your documents. By the end of this guide, you should have a good understanding of how to use Writer to create and format professional-looking documents.
Getting Started with LibreOffice Writer
Downloading and installing LibreOffice Writer
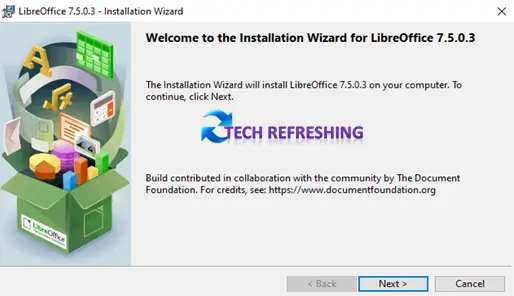
To begin utilizing LibreOffice Writer, it is necessary to download and install the software. Fortunately, it can be downloaded free of charge from the LibreOffice website and is compatible with Windows, Mac and Linux operating systems. Follow the instructions below to download and install LibreOffice Writer:
- Go to the LibreOffice website and click on the Download Now button.
- After making your operating system selection, click Download.
- Once the download is complete, open the installer file and follow the on-screen instructions to install the software.
Starting a new document
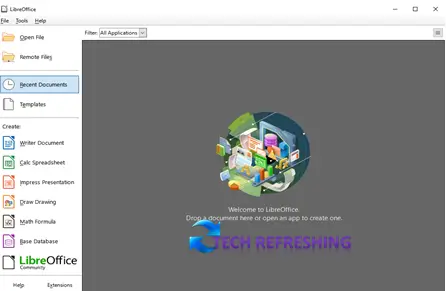
Once you have installed LibreOffice Writer, you can start a new document by following these steps:
- Open LibreOffice Writer from your desktop or start menu.
- Click on File in the top left corner of the screen.
- Select New from the drop-down menu.
- Choose the type of document you want to create, such as a Text Document or Template.
- Choose the type of document you want to create, such as a Text Document or Template.
Understanding the Writer interface
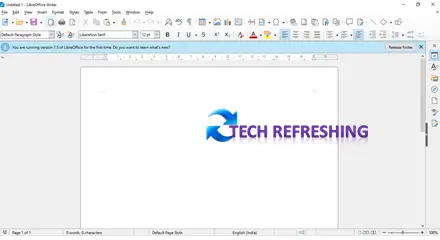
The LibreOffice Writer interface may look unfamiliar if you are used to other word processors, but it is easy to navigate once you understand the different components. Here is a brief overview of the different elements of the Writer interface:
- Menu bar: This is located at the top of the screen and contains different menus, such as File and Edit that allow you to perform different actions in Writer.
- Toolbars: These are located below the menu bar and contain icons for different actions, such as bolding text or creating a new document.
- Status bar: This is located at the bottom of the screen and displays information about the document you are working on, such as the page number and word count.
- Sidebar: This is located on the right side of the screen and provides additional tools and options for formatting your document.
- Document area: This is the main area of the screen where you will create and edit your document.
Once you have become acquainted with the various elements of the Writer interface, you can initiate utilizing the program to produce and format your documents.
Creating a Document
Adding text to a document
To start creating a document in LibreOffice Writer, you need to add text to the document. Here are the steps to add text to a document:
- Open a new or existing document in LibreOffice Writer.
- Click in the document area to place the cursor where you want to add text.
- The text you want to add should now be entered.
Once you have added text to the document, you can format it using the various tools and options available in Writer.
Inserting images and other media
In addition to text, you can also add images, videos and other media to your documents in Writer. Here are the steps to insert images and other media to the document:
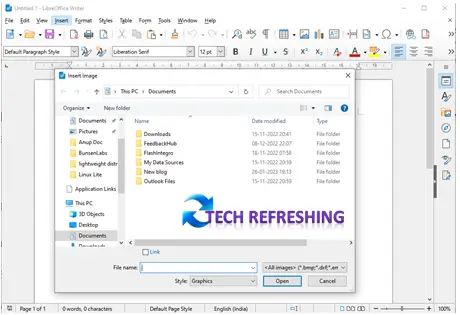
- Click on Insert in the menu bar.
- Select the type of media you want to insert, such as Image or Video.
- Click Open after selecting the file you want to insert.
- Use the handles on the image or media to resize and position it in the document.
- You can also format and adjust the properties of the media using the options available in Writer.
Creating tables and charts
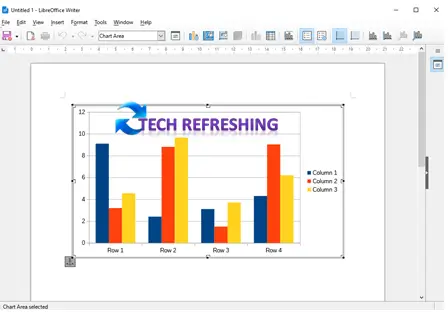
Data can be organised and presented in a document using tables and charts. The steps to make tables and charts in Writer are as follows:
- Click on Table in the menu bar.
- Select Insert and then choose the size of the table you want to create.
- Click and drag the cursor in the document area to define the size of the table.
- Once the table is created, you can add data to it by clicking on a cell and typing in the data.
- To create a chart, select the data in the table that you want to represent in the chart.
- Click on Insert in the menu bar and select Chart.
Choose the type of chart you want to create and follow the on-screen instructions to customize and format it.
Tables and charts can be customized and formatted in various ways using the tools and options available in Writer, making it easy to present data in an organized and visually appealing way.
Formatting Text
Changing font style and size
Modifying the text formatting is a crucial element of generating a document that has a professional appearance. The following steps can be undertaken to adjust the font style and size of your text:
- Select the text you want to format by clicking and dragging the cursor over it.
- Click on the Font drop-down menu in the toolbar or sidebar.
- Choose the font you want to use from the list of available fonts.
- Use the Size drop-down menu to select the size of the font you want to use.
Adding emphasis with bold, italic and underline
You can also add emphasis to your text by making it bold, italic or underlined. Here are the steps to add emphasis to your text:
- Select the text you want to emphasize by clicking and dragging the cursor over it.
- Click on the Bold, Italic or Underline icon in the toolbar or sidebar to add emphasis.
- You can also use keyboard shortcuts to quickly add emphasis to your text. For example, to make text bold, you can press Ctrl + B on Windows or Cmd + B on a Mac.
Using different text colors and highlights
Apart from modifying the font style and emphasis of the text, the utilization of various text colors and highlights can augment the visual appeal of your document. Refer to the steps provided below to employ diverse text colors and highlights:
- Select the text you want to format by clicking and dragging the cursor over it.
- Click on the Font color drop-down menu in the toolbar or sidebar.
- Choose the color you want to use from the list of available colors.
- To highlight text, click on the Highlight icon in the toolbar or sidebar and select the color you want to use.
- You can also customize the colors and highlights by creating your own custom colors or using color palettes.
By using the various text formatting options available in LibreOffice Writer, you can create professional-looking documents that are easy to read and visually appealing.
Paragraph Formatting
Adjusting line spacing and paragraph alignment
Paragraph formatting is an important aspect of creating a well-formatted document. Here are the steps to adjust line spacing and paragraph alignment:
- Select the text you want to format by clicking and dragging the cursor over it.
- Click on the Line spacing drop-down menu in the toolbar or sidebar.
- Choose the line spacing you want to use from the list of available options.
- To adjust paragraph alignment, click on the Alignment icons in the toolbar or sidebar and choose the alignment you want to use.
- You can also use keyboard shortcuts to quickly change the line spacing or paragraph alignment. For example, to align text to the center, you can press Ctrl + E on Windows or Cmd + E on a Mac.
Indenting paragraphs
Indenting paragraphs can help to create a clear and organized structure in your document. Here are the steps to indent paragraphs:
- Select the paragraphs you want to indent by clicking and dragging the cursor over them.
- Click on the Indent icons in the toolbar or sidebar to adjust the indentation.
- You can also use keyboard shortcuts to quickly indent paragraphs. For example, to indent a paragraph, you can press Ctrl + M on Windows or Cmd + M on a Mac.
Creating bullet and numbered lists
Bullet and numbered lists are useful for presenting information in a clear and organized way. Here are the steps to create bullet and numbered lists:
- Place the cursor where you want to start the list.
- Click on the Bullets or Numbering icon in the toolbar or sidebar to start a new list.
- Type in the first item in the list and press Enter to start a new item in the list.
- You can customize the style and format of your lists using the various tools and options available in Writer.
By using the various paragraph formatting options available in LibreOffice Writer, you can create well-structured and organized documents that are easy to read and understand.
Page Formatting
Setting margins and page orientation
Page formatting is important for making your document look neat and professional. Here are the steps to set margins and page orientation in LibreOffice Writer:
- Click on the Format menu in the menu bar at the top of the screen.
- Click on Page from the drop-down menu.
- In the Page Style dialog box, you can adjust the margin settings by clicking on the Margins tab. You can adjust the top, bottom, left and right margins to your desired size.
- You can change the page orientation by selecting either Portrait or Landscape from the Page tab.
Adding headers and footers
Headers and footers are useful for adding information to the top or bottom of each page in your document, such as the document title, page number or author name. Here are the steps to add headers and footers in LibreOffice Writer:
- Click on the “Insert” menu in the menu bar at the top of the screen.
- Click on Header or Footer from the drop-down menu, depending on where you want to add your information.
- Select the type of header or footer you want to use from the list of available options.
- Type in the text you want to add to the header or footer, such as the document title, page number or author name.
Creating page breaks and section breaks
Page and section breaks are useful for dividing your document into different sections or for starting new pages within a section. Here are the steps to create page and section breaks in LibreOffice Writer:
- Place the cursor where you want to insert a page or section break.
- Click on the Insert menu in the menu bar at the top of the screen.
- Click on Page Break or Section Break from the drop-down menu, depending on the type of break you want to insert.
- You can also customize the format and layout of your pages and sections by using the various tools and options available in Writer.
LibreOffice Writer provides a range of page formatting options that enable you to produce documents that are visually attractive, easy to comprehend, and well-structured.
Styles and Templates
Understanding the purpose of styles and templates
Styles and templates are an important aspect of LibreOffice Writer and they can help you create consistent and professional looking documents. A style is a set of formatting instructions that you can apply to text, paragraphs or entire documents. Templates, on the other hand, are pre-designed documents that you can use as a starting point for your own work.
Creating and modifying styles
Here are the steps to create and modify styles in LibreOffice Writer:
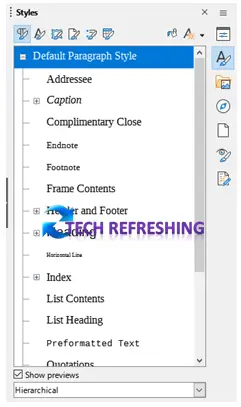
- Click on the Styles and Formatting button in the toolbar or press F11 on your keyboard to open the Styles and Formatting panel.
- In the panel, you can see the list of available styles. To create a new style, click on the New Style button and give your new style a name.
- You can modify the attributes of your style by selecting it and clicking on the Modify button. This will open the Modify Style dialog box, where you can make changes to the font, size, color and other formatting options.
After creating and editing your styles, you can employ them in your document by choosing the text or paragraph you wish to format and then selecting the corresponding style in the Styles and Formatting panel.
Using templates to save time
Templates can be useful when you need to create documents that have a consistent format, such as letters, resumes or invoices. Here are the steps to use templates in LibreOffice Writer:
- Click on the File menu in the menu bar at the top of the screen and then click on New from the drop-down menu.
- In the Template dialog box, you can choose from the available templates, or you can create a new template by clicking on the Create button.
You can begin creating your document after choosing a template. You can customise the basic layout and formatting provided by the template to meet your needs.
By using styles and templates in LibreOffice Writer, you can save time and create professional looking documents with ease. Once you have created your styles and templates, you can apply them to future documents and make adjustments as needed.
Finalizing a Document
Spell checking and proofreading
LibreOffice Writer comes with a built-in spell checker that can help you catch spelling and grammatical errors in your document. To use the spell checker, you can go to the Tools menu and select Spelling and Grammar. The spell checker will then scan your document and highlight any errors it finds. You can choose to ignore, add to dictionary or replace the highlighted words.
Apart from the spell checker, you have the option to use AutoCorrect in LibreOffice Writer, which corrects typical spelling errors automatically while you type. To personalize the AutoCorrect settings, navigate to the Tools menu and click on AutoCorrect Options.
Using track changes and commenting features
When collaborating on a document with others, utilizing the track changes and commenting features in LibreOffice Writer can be useful. The track changes feature highlights modifications made to the document, making them visible to other users. The commenting feature allows you to leave feedback on specific sections of the document.
To activate the track changes feature, you may navigate to the Edit menu and select it. Afterward, you can make changes to the document as usual, and the revisions will be highlighted in a distinct color. In contrast, to use the commenting feature, you can access the Insert menu and choose Comment. Upon selecting the text, you can type in your comment, and it will appear in a bubble beside it.
Exporting the document to a different format
You might need to export your document from LibreOffice Writer to another format, such PDF or Microsoft Word, after you’ve finished editing it. Go to the File menu and choose Export As to accomplish this. Then, from the list of offered formats, pick the one you want.
Keep in mind that exporting your document to another format can lead to certain formatting or element losses. Thus, you must review the exported document meticulously to guarantee that it retains the appearance you envisioned.
By using the spell checker and proofreading tools, the track changes and commenting features and the exporting options, you can finalize your document in LibreOffice Writer and prepare it for sharing or distribution.
Conclusion
Recap of main points
Throughout this introductory tutorial on LibreOffice Writer, we have covered a range of subjects. We began by defining what LibreOffice Writer is and how it differs from other word processing software. From there, we addressed how to download and install LibreOffice Writer, initiate a new document and gain a comprehension of the Writer interface.
Next, we covered the basics of creating a document, such as adding text, inserting images and other media, and creating tables and charts. We also discussed formatting text, including changing font styles and sizes, adding emphasis with bold, italic, and underline, and using different text colors and highlights.
We then delved into paragraph formatting, including adjusting line spacing and paragraph alignment, indenting paragraphs, and creating bullet and numbered lists. We also covered page formatting, such as setting margins and page orientation, adding headers and footers, and creating page breaks and section breaks.
Finally, we discussed the importance of styles and templates in saving time and creating consistent documents. We also covered the final steps of spell checking and proofreading, using track changes and commenting features, and exporting the document to a different format.
Encouragement to continue exploring LibreOffice Writer
There is still so much more to discover in LibreOffice Writer. We encourage you to continue exploring the software and experimenting with its features. You may discover new ways to streamline your workflow or create more professional-looking documents.
Final thoughts and recommendations
LibreOffice Writer is a potent and adaptable word processing software that can cater to the requirements of both individuals and enterprises. Whether you are generating a straightforward document or a multifaceted report, LibreOffice Writer’s array of tools and features can assist you in accomplishing your task. We suggest giving it a go to experience how it can enhance your document creation process.


