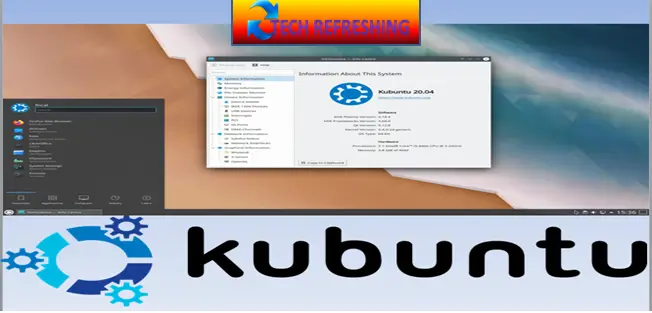
Kubuntu is a Linux Distribution which is based on Ubuntu Operating System. Kubuntu is using KDE plasma Desktop environment. It is a part of Ubuntu Project and it shares the same repositories as Ubuntu. So its releasing cycle is also the same as Ubuntu. Firstly Kubuntu was sponsored by Canonical Ltd. until 2012 but now it is maintained by Blue system. The basic difference between Ubuntu and Kubuntu is the Desktop Environment they are using. Ubuntu is using GNOME desktop and on the other hand Kubuntu is using KDE Plasma Desktop. That’s why they Add ‘K’ before Ubuntu, K stands for KDE.
Kubuntu is a good lightweight Operating System that is also a good alternative to Windows and Mac Operating System. Kubuntu is a totally free and fully open source Operating System. If you want to shift from Windows or Mac then this is a good option for you. In low end PC you can’t run Windows Operating System but you can run Kubuntu easily. Kubuntu runs also in very low resources. New user also can easily install and use Kubuntu by its own don’t need specialist. The latest LTS support version of Kubuntu is 22.04 LTS (Jammy Jellyfish) which was released on April, 2022 and it will support up to April 2027.
Let’s see How to Install Kubuntu in your System Step by Step guide with Screen short.
System Requirements for Kubuntu 22.04 LTS:
- Processor: – x86-64bit
- RAM:- 2 GB
- Hard Disk :- 25 GB
- Pen Drive:- 5 GB
- Internet connectivity is optional.
Please Follow the Following Steps to Install a Fresh Copy to your PC/Laptop.
Step 1.
Download Kubuntu 22.04 ISO file from the official website of Kubuntu. The link of Kubuntu website is Download Kubuntu | Kubuntu . Click on given link and download the ISO image from it.
Step 2.
After download ISO image make USB stick bootable with Kubuntu. For that you need free software “Balena Etcher”. It is very easy to use software. This software is freely available on the official website of Balena Etcher. Link of the website is given below: –
balenaEtcher – Flash Operating System images to SD cards & USB drives
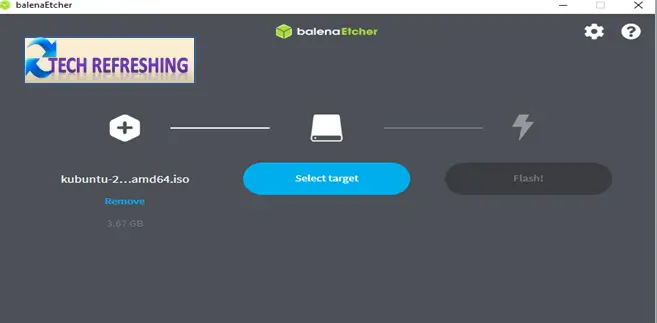
If you are facing any kind difficulties to install Balena Etcher then go to My post whose link in given below:
Step 3.
After making bootable disk, boot with bootable USB. The first screen will appear as below:
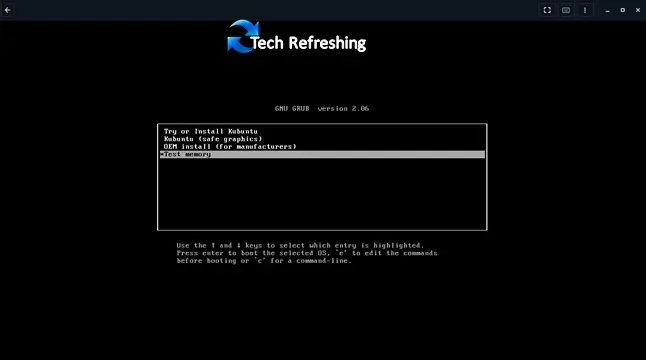
Here press enter from keyboard after selecting “Try or Install Kubuntu”.
Step 4.
You have to wait for sometimes, then the Kubuntu Installation Screen will appear as given below.
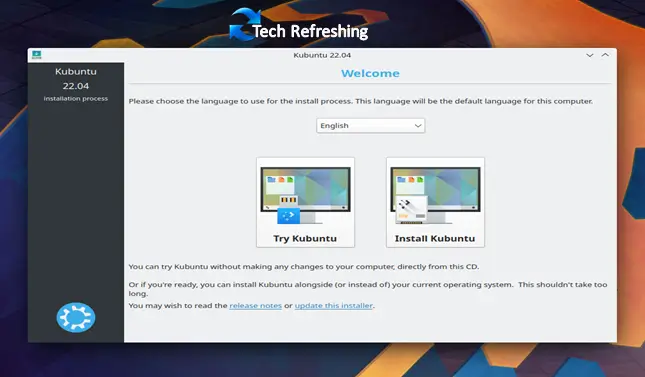
Here click on Install Kubuntu.
Step 5.
Now chose keyboard Layout and Language from the drop-down menu then press Continue.
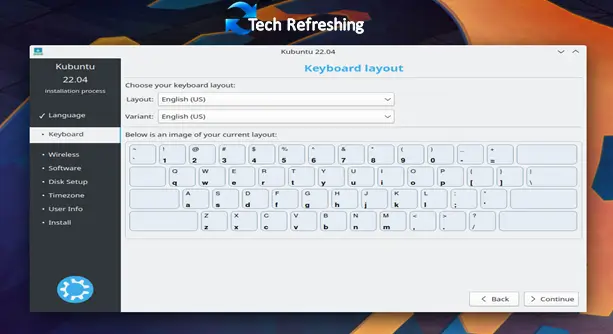
Step 6.
Here select Normal Installation and if you have running internet connection then also check mark on Install third-party Software option. Now click on continue.
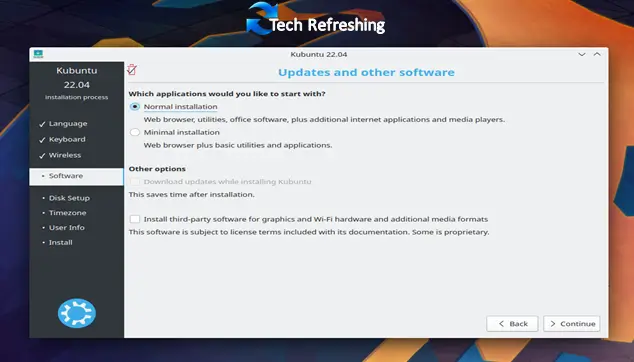
Step 7.
This is the most important step, Disk Setup or Disk Partition. Here you can select Guided- use entire disk (for fresh installation only) option. If you are installing dual boot with your Windows OS then go with Manual Option. But we are installing fresh installation, so we will select Guided- use entire disk and click on Install Now option.
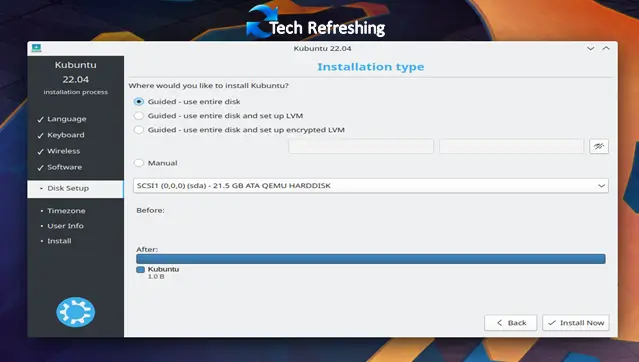
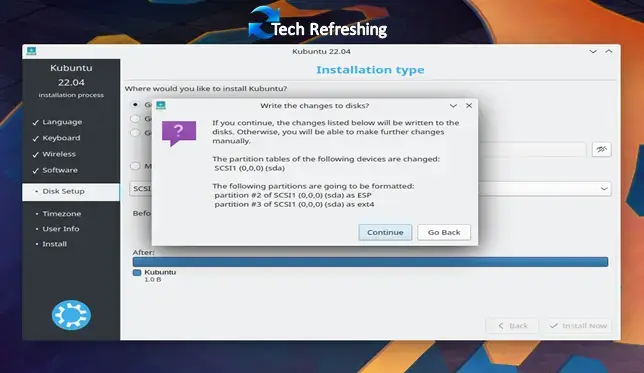
Step 8
Confirmation message will appear. Here click on continue.
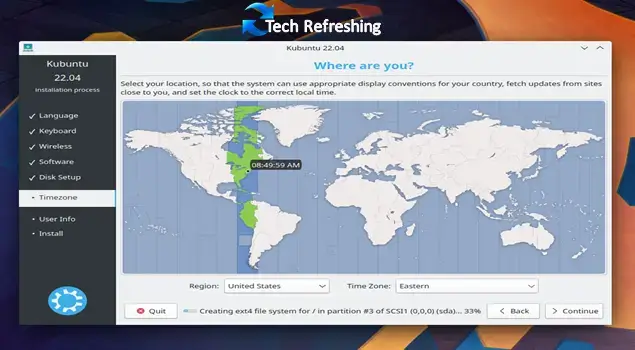
Step 9.
Select your Region and Time zone then click on continue.
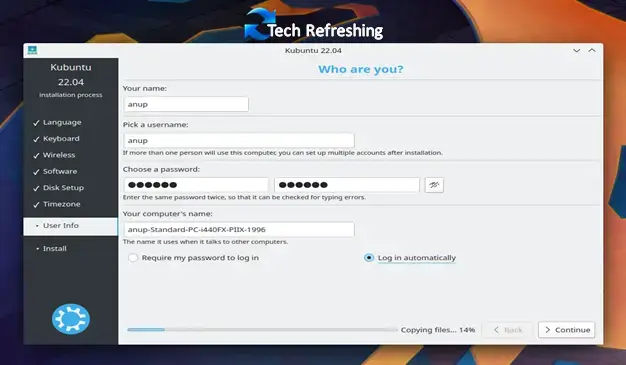
Step 10.
Now you have to create User login account and set password for that. Fill the information like user id and password then click on continues.
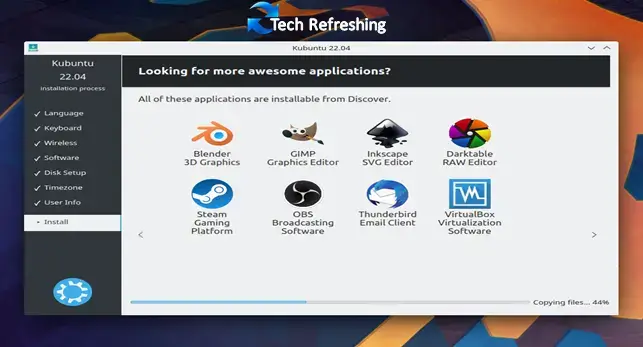
Step 11.
Installation Starts, now wait patiently for some time and let the system to do the installation work automatically.
Step 12.
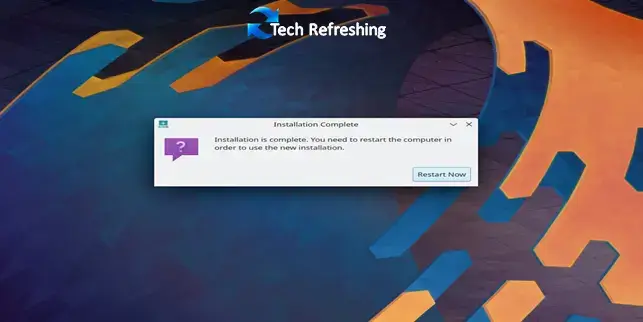
Installation finish, click on Restart Now button. Your system will restart with installed new Kubuntu Linux OS.
After reboot here is the first screen. Congratulations you have successfully installed Kubuntu 20.04 .
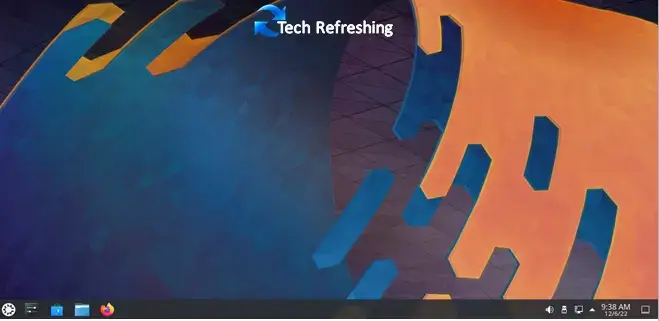
After installation you have to update your system. Basic software’s are preinstalled with this Operating System. If you want to install other application, then go to Discovery software center and download software from there as per your requirement. This is very easy use OS. If you face any kind of difficulty, then please comment below.

