Top 5 Android Distributions for Laptops
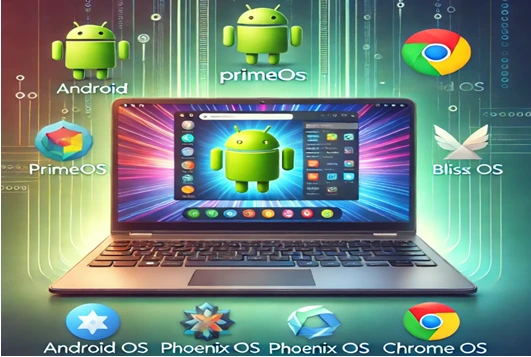
In recent years, the idea of running Android on laptops has gained immense popularity. Whether you’re looking to bring the vast Android app ecosystem to a bigger screen or want a lightweight operating system for older hardware, there are several Android distributions available for laptops. This blog post explores the top five Android distributions that offer seamless performance, features, and user-friendly interfaces for laptop users.
Top 5 Android Distributions for Laptops
1. PrimeOS: Transforming Your Laptop into an Android Powerhouse
In the ever-evolving world of operating systems, PrimeOS stands out as a game-changer, bringing the Android experience right to your laptop or PC. Imagine having access to millions of Android apps on a desktop-like interface—sounds intriguing, right? Let’s dive deep into what makes PrimeOS a fantastic choice for users looking to blend mobility with productivity.
What is PrimeOS?
PrimeOS is an Android-based operating system designed specifically for personal computers and laptops. Developed by PrimeOS Technologies, it aims to bridge the gap between mobile and desktop computing by offering a seamless Android experience on larger screens. Think of it as giving your old or new PC a fresh lease on life with the familiarity and versatility of Android.
Why Choose PrimeOS?
1. Desktop-Like Interface
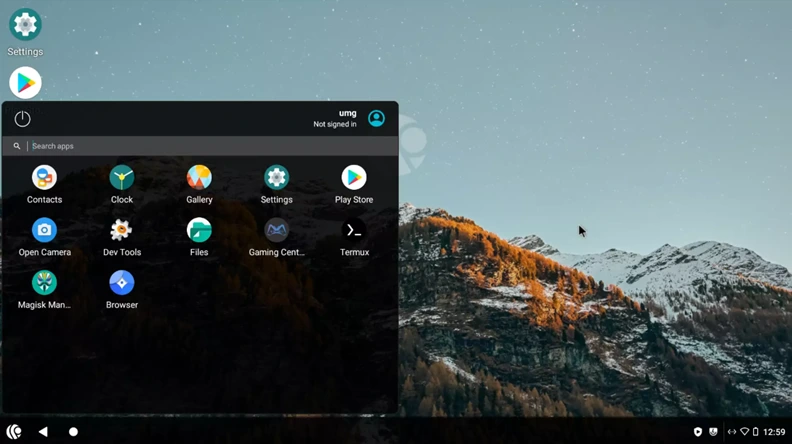
PrimeOS doesn’t just emulate Android on a PC; it transforms it. The interface is reminiscent of Windows or macOS, complete with a taskbar, start menu, and system tray. This means transitioning from your traditional OS to PrimeOS feels natural and intuitive.
2. Multi-Window Support
Multitasking is a breeze. PrimeOS allows you to run multiple Android apps in resizable windows, enabling you to browse the web while streaming music or chatting with friends—all without missing a beat.
3. Optimized for Gaming
Gamers, rejoice! PrimeOS comes with built-in key mapping, gamepad support, and a dedicated gaming center. Popular Android games like PUBG Mobile and Call of Duty: Mobile run smoothly, giving you the edge with mouse and keyboard controls.
4. Seamless App Access
With full access to the Google Play Store, you can download and install your favorite apps and games effortlessly. Whether it’s productivity tools, streaming apps, or games, PrimeOS has you covered.
5. Efficient File Management
PrimeOS includes a robust file manager, making it easy to organize files and folders just like on a traditional PC. Managing downloads, documents, and media files has never been more straightforward.
How to Install PrimeOS
Installing PrimeOS on your laptop or PC is a straightforward process. Follow these steps to get started:
Step 1: Download PrimeOS
Go to the official PrimeOS website and download the appropriate version (Standard, Classic, or Mainline) based on your system’s specifications.
Step 2: Create a Bootable USB Drive
- Download and install software like Rufus or Etcher.
- Insert a USB drive (at least 8GB) into your PC.
- Open Rufus/Etcher, select the PrimeOS ISO file, and create a bootable USB drive.
Step 3: Boot from USB
- Restart your PC and enter the BIOS/UEFI settings (usually by pressing F2, F12, or DEL during startup).
- Change the boot order to prioritize the USB drive.
- Save changes and restart.
Step 4: Install PrimeOS
- Once booted, you will see installation options.
- Select “Install PrimeOS” and choose your preferred partition.
- Follow the on-screen instructions to complete the installation.
Step 5: Reboot and Enjoy
- Once installation is complete, remove the USB drive and restart your PC.
- Select PrimeOS from the boot menu and enjoy the Android experience on your laptop!
Real-World Applications of PrimeOS
- For Gamers: Enhanced graphics, key mapping, and multi-window support make it perfect for gaming on a bigger screen.
- For Students: Affordable devices like the Primebook 4G, running PrimeOS, provide a powerful learning tool with access to educational apps and online resources.
- For Professionals: Productivity apps, web browsing, and multi-tasking features make PrimeOS a suitable choice for work.
- For Developers: It’s an excellent platform for testing and developing Android apps in a desktop environment.
The Primebook 4G: A PrimeOS-Powered Laptop
One of the most exciting developments in the PrimeOS ecosystem is the launch of the Primebook 4G. Designed with students in mind, this affordable Android laptop is priced around Rs 12,990. It features an 11.6-inch HD IPS display, 4GB RAM, 64GB storage, and a 2GHz processor. The device is lightweight, portable, and grants access to over 10,000 Android apps—perfect for learning, entertainment, and productivity.
Things to Consider
While PrimeOS is impressive, it’s essential to keep a few things in mind:
- App Compatibility: Not every Android app is fully optimized for desktop use. Some apps may not scale well or could have limited functionality.
- Hardware Compatibility: PrimeOS works well on many devices, but it’s always best to check your PC’s specs to ensure smooth performance.
- Learning Curve: If you’re used to Windows or macOS, adjusting to Android on a desktop might take a little time.
PrimeOS is a brilliant solution for anyone wanting to experience Android on a larger screen. Whether you’re a gamer looking for better controls, a student needing affordable tech, or just someone wanting to revive an old laptop, PrimeOS delivers versatility and performance. It truly is a fusion of the best of both mobile and desktop worlds.
So, why not give your laptop a fresh start with PrimeOS? Dive into the Android ecosystem like never before and unlock new possibilities!
2. Bliss OS: Bringing Android Power to Your Laptop
In a world where operating systems are constantly evolving, Bliss OS stands out as a revolutionary platform that brings the Android experience seamlessly to laptops and PCs. Imagine combining the flexibility of Android apps with the power of desktop computing—Bliss OS makes this a reality. Let’s explore why Bliss OS is the perfect choice for users seeking performance, customization, and versatility.
What is Bliss OS?
Bliss OS is an open-source Android-based operating system designed to run smoothly on laptops and desktops. Developed by the non-profit organization BlissLabs, it aims to merge the simplicity of Android with the functionality of desktop environments. Whether you’re looking to revive an old PC or maximize the potential of new hardware, Bliss OS delivers a streamlined and powerful experience.
Why Choose Bliss OS?
1. Versatile User Interface
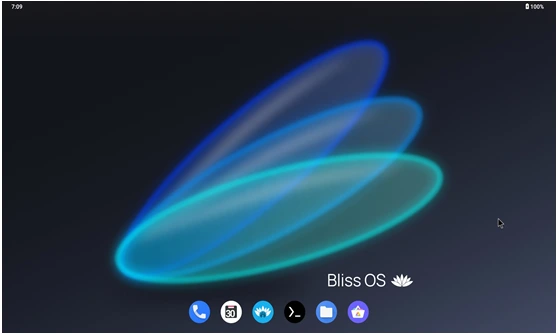
Bliss OS offers the flexibility to switch between Desktop and Tablet UI modes. This adaptability means you can choose a setup that best suits your workflow—whether it’s a touch-friendly tablet interface or a more traditional desktop layout.
2. Customizable and Minimalistic Design
Designed to be free from bloatware and adware, Bliss OS delivers a clean and customizable user experience. You have full control over how your system looks and functions, with options to tailor settings for various screen sizes and performance needs.
3. Optimized Performance and Compatibility
Bliss OS is built for speed and stability. With ARM/ARM64 compatibility, it allows you to run your favorite Android apps and games on x86 PCs effortlessly. Whether for gaming, streaming, or productivity, Bliss OS ensures smooth performance.
4. Gaming Enhancements
For gamers, Bliss OS introduces key features like VA-API hardware-accelerated video decoding and the XtMapper keymapper, offering improved control and gameplay. Although XtMapper is still in development, it already enhances the experience of using keyboards and mice for gaming.
5. KernelSU Integration for Advanced Users
Bliss OS is the first Android-x86 distribution to integrate KernelSU, enabling advanced users to easily grant root permissions and install Magisk modules without modifying the system partition. This feature is ideal for tech enthusiasts who want deeper system control.
How to Install Bliss OS
Installing Bliss OS is simple and user-friendly. Here’s how you can get started:
Step 1: Download Bliss OS
- Visit the official Bliss OS website and download the version that suits your system (Stable, Beta, or Zenith).
Step 2: Create a Bootable USB Drive
- Use Rufus or Etcher to create a bootable USB drive with the downloaded ISO file.
- Insert a USB drive (minimum 8GB) and follow the tool’s instructions.
Step 3: Boot from USB
- Restart your PC and enter BIOS/UEFI settings (press F2, F12, or DEL during startup).
- Change the boot order to prioritize the USB drive.
- Save changes and reboot.
Step 4: Install Bliss OS
- Choose “Install Bliss OS” from the boot menu.
- Select the desired partition and follow the on-screen instructions.
Step 5: Start Exploring
- Once installed, remove the USB drive and reboot.
- Enjoy the Android experience on your laptop or PC!
Who Should Use Bliss OS?
- Gamers: Experience better controls and performance with gaming features like key mapping and hardware acceleration.
- Students: Enjoy affordable computing with access to educational apps and online resources.
- Professionals: Boost productivity with multi-window support and customizable desktop interfaces.
- Developers: Test and develop Android apps in a versatile desktop environment.
Versions of Bliss OS
Bliss OS offers several versions tailored to user needs:
- Bliss OS 14 (Stable): Based on Android 11 for stability.
- Bliss OS 15 (Stable): Built on Android 12L for enhanced performance.
- Bliss OS 16 (Beta): Beta version based on Android 13.
- Bliss OS Zenith: Cutting-edge development builds with the latest features.
Bliss OS redefines what an Android-based operating system can be on laptops and PCs. With its customizable interface, robust performance, and gaming-friendly features, it bridges the gap between mobile and desktop computing. Whether you want to revitalize an old laptop, enjoy Android games on a larger screen, or develop apps with ease, Bliss OS offers a versatile and powerful solution.
Ready to transform your laptop with Bliss OS? Download it today and experience the best of Android on your desktop!
3. Phoenix OS: Breathing New Life into Laptops with Android
In the ever-evolving world of operating systems, Phoenix OS stands out as a unique and compelling choice for users looking to merge the flexibility of Android with the power of a desktop experience. Developed by Beijing Chaozhuo Technology Co. Ltd, Phoenix OS brings Android to laptops and desktops, offering users a seamless blend of mobile convenience and desktop productivity.
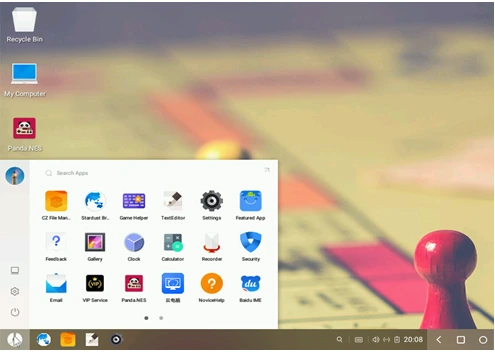
What is Phoenix OS?
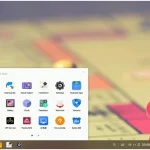
Phoenix OS is an Android-based operating system designed to run on x86 architecture, making it compatible with most laptops and desktop computers. Its interface mirrors that of traditional desktop environments, complete with a taskbar, start menu, and multi-window support. This design makes it feel familiar to users coming from Windows or macOS while delivering the versatility of Android apps.
Key Features of Phoenix OS
1. Desktop-Like Interface:
Phoenix OS offers a user-friendly interface similar to Windows, featuring a start menu, taskbar, and resizable windows. This setup is perfect for multitasking, allowing users to run multiple apps side by side.
2. Wide Application Compatibility:
With access to the vast Android app ecosystem, Phoenix OS can run millions of apps directly from the Google Play Store or APK files. From productivity tools like Microsoft Office and Google Docs to entertainment apps like Netflix and Spotify, the possibilities are endless.
3. Gaming Optimization:
Phoenix OS is a dream come true for Android gamers. It supports keymapping, enabling users to map touch controls to keyboard and mouse inputs. This feature enhances gameplay for popular titles like PUBG Mobile, Free Fire, and Call of Duty Mobile.
4. Multi-Window and Multitasking:
Users can open multiple applications in separate windows, much like on Windows or macOS. This feature makes multitasking efficient, whether you’re browsing the web, watching videos, or working on documents.
5. Lightweight and Fast:
Compared to traditional operating systems, Phoenix OS is lightweight and can breathe new life into older laptops. It runs smoothly on modest hardware, offering fast boot times and responsive performance.
Installation and Compatibility
Installing Phoenix OS is straightforward. It supports both 32-bit and 64-bit systems and can be installed on a hard drive, USB drive, or run as a live OS. Users can choose between the Standard version, which is free and includes all essential features, and the ROC version, which offers advanced functionalities like root access and Google Play Services pre-installed.
How to Install Phoenix OS
Step 1: Download Phoenix OS
- Visit the official Phoenix OS website and download the latest version suitable for your system (32-bit or 64-bit).
Step 2: Create a Bootable USB Drive
- Use tools like Rufus or Etcher to create a bootable USB drive with the Phoenix OS ISO file.
Step 3: Boot from USB
- Restart your computer and enter the BIOS/UEFI settings (usually by pressing F2, F12, or Del). Set the USB drive as the primary boot device.
Step 4: Install Phoenix OS
Follow the on-screen instructions to install Phoenix OS. You can choose to install it on your hard drive or run it in live mode without installation.
Step 5: First Boot and Setup
Once installed, boot into Phoenix OS, complete the setup process, and enjoy the Android desktop experience!
Pros and Cons of Phoenix OS
Pros:
- Familiar desktop-like experience with Android flexibility
- Supports millions of Android apps
- Optimized for gaming with keymapping support
- Lightweight and suitable for older hardware
Cons:
- Some apps may not be fully optimized for desktop use
- Potential hardware compatibility issues
- Less frequent software updates compared to mainstream OS
Who Should Use Phoenix OS?
Phoenix OS is ideal for users who want to:
- Revive an old laptop or PC with a lightweight OS
- Enjoy Android games with better controls
- Access Android apps in a desktop environment
- Experiment with Android development on a larger screen
Phoenix OS successfully bridges the gap between mobile and desktop computing. Its intuitive interface, vast app compatibility, and gaming optimizations make it a versatile choice for a variety of users. Whether you’re a gamer, a student, or someone simply looking to try something new, Phoenix OS offers a refreshing alternative to traditional operating systems.
Give it a try, and see how Android can redefine your laptop experience!
4. Android-x86: Transforming Laptops with the Power of Android
In today’s tech-driven world, the line between mobile and desktop computing continues to blur. Android-x86 steps in as a game-changer by bringing the Android operating system to laptops and desktops, offering users the familiar Android experience on larger, more powerful devices.
What is Android-x86?
Android-x86 is an open-source project aimed at porting the Android operating system to devices powered by x86 processors, like laptops and desktops. Originally started by Chih-Wei Huang and Yi Sun in 2009, the project has evolved to support a wide range of hardware, offering a seamless Android experience beyond smartphones and tablets.
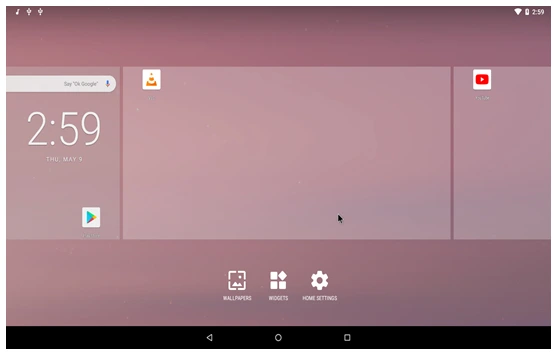
Key Features of Android-x86
1. Desktop-Friendly Interface:
Android-x86 adapts Android’s touch-friendly interface for larger screens, featuring mouse and keyboard support, windowed apps, and a desktop-like environment that feels natural for PC users.
2. Broad Hardware Compatibility:
Android-x86 supports a variety of laptops and desktops, offering compatibility with different chipsets, graphics cards, Wi-Fi adapters, and storage devices.
3. Access to Millions of Apps:
With Google Play Store support, Android-x86 lets users install and enjoy millions of Android apps, from productivity tools to entertainment and games.
4. Multitasking and Multi-Window Support:
Run multiple apps simultaneously with multi-window functionality, just like on traditional desktop operating systems.
5. Lightweight and Fast Performance:
Android-x86 is optimized for speed and efficiency, making it a great choice for breathing new life into older hardware.
How to Install Android-x86
Step 1: Download the ISO
- First Visit the official Android-x86 website and download the latest ISO suitable for your system.
Step 2: Create a Bootable USB Drive
- Use software like Rufus (Windows) or Etcher (Linux/macOS) to create a bootable USB drive with the downloaded ISO file.
Step 3: Boot from USB
- Restart your computer and enter the BIOS/UEFI settings to set the USB drive as the primary boot device.
Step 4: Install or Run Live Mode
- Choose to either install Android-x86 on your hard drive or run it in live mode for testing without installation.
Step 5: Set Up and Explore
- After installation, boot into Android-x86, complete the setup, and start enjoying Android on your laptop or desktop!
Pros and Cons of Android-x86
Pros:
- Familiar Android environment on larger screens
- Access to Google Play Store and Android apps
- Lightweight, ideal for older computers
- Customizable and open-source
Cons:
- Potential hardware compatibility issues
- Some apps may not be optimized for non-touch devices
- Less frequent updates compared to mainstream Android versions
Who Should Try Android-x86?
Android-x86 is perfect for:
- Users wanting to revive old laptops with a lightweight OS
- Developers testing Android apps on real hardware
- Gamers seeking Android gaming on larger screens with keyboard/mouse controls
- Tech enthusiasts exploring Android beyond mobile devices
Android-x86 opens the door for Android to extend beyond smartphones, offering a versatile and efficient computing experience on laptops and desktops. Whether you’re looking to repurpose old hardware or simply curious about Android on a bigger screen, Android-x86 is a fantastic way to blend mobile convenience with desktop functionality.
Give Android-x86 a try and unlock the full potential of Android on your laptop!
5. ChromeOS: The Android Distribution Revolutionizing Laptops
In recent years, Google has been blurring the lines between its two flagship operating systems: ChromeOS and Android. This seamless integration is creating a robust and versatile platform for laptops, one that merges the simplicity of ChromeOS with the flexibility and app ecosystem of Android. With Chromebooks gaining popularity in education, business, and personal use, it’s the perfect time to explore how ChromeOS has evolved to become the leading Android-based operating system for laptops.
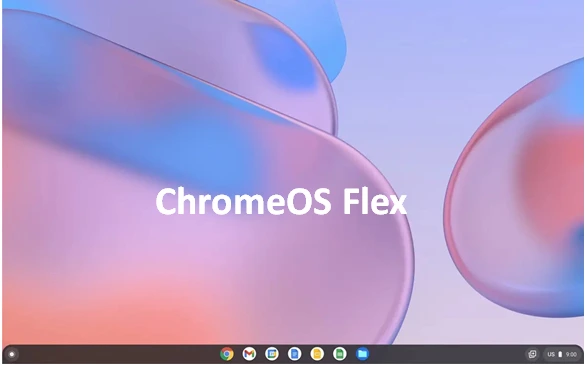
What is ChromeOS?
ChromeOS started as a lightweight operating system designed for web-centric tasks. Initially seen as just a “browser-based OS,” it has matured into a full-fledged operating system that supports a variety of apps, including web, Android, and even Linux applications. Chromebooks, which are powered by ChromeOS, are known for their fast boot times, battery efficiency, and affordability.
Google’s decision to integrate Android apps into ChromeOS has taken these devices to the next level, making them far more versatile than ever before. Today, Chromebooks are no longer just devices for students or casual users—they’re reliable tools for professionals, developers, and content creators alike.
The Android-ChromeOS Connection
One of the most significant updates to ChromeOS was the introduction of Android app support. This feature allows users to access millions of Android apps via the Google Play Store, opening up endless possibilities for productivity, creativity, and entertainment.
Here’s how the integration benefits users:
1. A Familiar App Ecosystem
Whether you’re an Android smartphone user or tablet enthusiast, the availability of apps like Microsoft Office, Adobe Lightroom, and Google Meet ensures that your workflow transitions smoothly to your Chromebook.
2. Improved Bluetooth and Connectivity
Google recently integrated Android’s Bluetooth stack into ChromeOS, resulting in faster device pairing and better performance for peripherals like headphones, mice, and keyboards.
3. Cross-Device Functionality
Features like “Phone Hub” allow seamless synchronization between Android phones and Chromebooks. You can send texts, check notifications, and even share files effortlessly between devices.
4. AI-Driven Features
With the incorporation of Android-like AI capabilities, Chromebooks are getting smarter. For instance, features like Google Assistant and contextual suggestions simplify multitasking and enhance overall user experience.
Linux Support: Supercharging ChromeOS
In addition to Android apps, ChromeOS supports Linux applications, making it a powerful tool for developers and advanced users. If you need software that’s unavailable as an Android or web app—like coding environments, advanced video editors, or design tools—Linux support fills that gap.
Some of the most popular Linux apps for Chromebooks include:
- LibreOffice: A comprehensive alternative to Microsoft Office.
- GIMP: A Photoshop-like image editor.
- Kdenlive: A powerful, open-source video editing software.
- FileZilla: For FTP and file management needs.
- Evolution: An email and calendar client for professionals.
These apps, combined with ChromeOS’s cloud-based capabilities, make Chromebooks highly versatile for any task.
How to Install ChromeOS on Any Laptop
If you don’t own a Chromebook but want to try ChromeOS on your existing laptop, you can do so using ChromeOS Flex—a free, lightweight version of ChromeOS designed for PCs and Macs.
Steps to Install ChromeOS Flex:
1. Check Device Compatibility
Visit the ChromeOS Flex compatibility page to ensure your laptop is supported. While ChromeOS Flex works on many devices, performance may vary depending on your hardware.
2. Download ChromeOS Flex Installer
- Use a separate computer to create a bootable USB drive.
- Install the Chromebook Recovery Utility from the Chrome Web Store.
- Open the utility, click Get Started, and select ChromeOS Flex from the dropdown menu.
3. Prepare a Bootable USB Drive
- Insert a USB drive with at least 8GB of storage.
- Follow the prompts in the Recovery Utility to create the bootable drive.
- Boot Your Laptop Using the USB Drive
4. Insert the USB into your target laptop.
- Restart the laptop and access the boot menu (usually by pressing F12, Esc, or a similar key during startup).
- Select the USB drive as the boot device.
5. Install ChromeOS Flex
- Once booted, you’ll see the ChromeOS Flex installation screen.
- You can choose to try ChromeOS Flex without installation or install it permanently on your laptop.
- Follow the on-screen instructions to complete the installation.
6. Sign In and Explore
- Once installed, sign in with your Google account to start using ChromeOS Flex.
- Access the Play Store, Linux apps, and more, just like on a Chromebook.
Performance and Security
ChromeOS Flex shares the same lightweight, fast, and secure architecture as ChromeOS on official Chromebooks. You’ll benefit from automatic updates, built-in virus protection, and a secure sandbox environment for apps.
ChromeOS has come a long way from its humble beginnings. The integration of Android apps and Linux support has turned it into a versatile operating system for all kinds of users. Whether you’re a student looking for a budget-friendly device or a professional seeking a lightweight laptop for everyday tasks, Chromebooks powered by ChromeOS—or laptops running ChromeOS Flex—offer a seamless experience that rivals traditional laptops.
As Google continues to innovate and merge its Android and ChromeOS ecosystems, we can only expect Chromebooks and ChromeOS Flex to get smarter, faster, and more capable. If you haven’t considered one yet, now might be the perfect time to give it a try.
System Requirements for Android OS
| Android Distribution | Minimum RAM | Minimum Storage | Processor Requirements |
|---|---|---|---|
| PrimeOS | 2GB | 64GB | Most modern processors |
| Bliss OS | 2GB | 16 GB | Dual-core processors |
| Phoenix OS | 2GB | 16GB | Most modern processors |
| Android-x86 | 1GB | 16 GB | Intel or AMD processors |
| Chrome OS | 4GB | 16GB | Compatible with Chrome OS Flex hardware |
Conclusion
Choosing the right Android distribution for your laptop depends on your specific needs and hardware capabilities. Here is a quick summary:
- PrimeOS: Ideal for gamers and users seeking a desktop-like interface.
- Bliss OS: Perfect for those who love customization and frequent updates.
- Phoenix OS: A great choice for productivity-focused users.
- Android-x86: Best for a near-stock Android experience.
- Chrome OS: Ideal for users who prefer a lightweight, web-centric OS with Android app support.
Evaluate your requirements and hardware specifications to find the best fit. These Android distributions offer a unique opportunity to enjoy Android apps and features on your laptop, unlocking new possibilities for work, play, and creativity.
Frequently Asked Questions (FAQs)
PrimeOS
Is PrimeOS suitable for gaming?

Yes, PrimeOS is designed with gamers in mind, offering key mapping and a dedicated gaming center.
Can I install PrimeOS on older laptops?
Yes, PrimeOS works well on most modern laptops with at least 2GB of RAM.
Does PrimeOS support dual booting?
Yes, you can install PrimeOS alongside your existing operating system.
Bliss OS
What makes Bliss OS unique?
Bliss OS offers multiple desktop layouts and extensive customization options.
Is Bliss OS open-source?
Yes, Bliss OS is fully open-source and actively maintained by developers.
Can Bliss OS run on 32-bit systems?
Yes, Bliss OS supports both 32-bit and 64-bit architectures.
Phoenix OS
Is Phoenix OS good for multitasking?
Yes, its multi-window support makes it ideal for multitasking.
Can Phoenix OS be installed on a USB drive?
Yes, it supports live USB mode for running without installation.
Is Phoenix OS optimized for gaming?
Yes, it includes a gaming assistant for enhanced gaming experiences.
Android-x86
What is Android-x86?
It is an open-source project that ports Android to x86-based systems.
Does Android-x86 support Wi-Fi and Bluetooth?
Yes, it supports most hardware, including Wi-Fi and Bluetooth.
Can Android-x86 run on low-end hardware?
Yes, it requires only 1GB of RAM for basic operations.
Chrome OS
Can I install Chrome OS on any laptop?

Chrome OS Flex allows installation on non-Chromebook devices.
Does Chrome OS support Android apps?
Yes, it supports Android apps via the Google Play Store.
Can I use Chrome OS offline?
While Chrome OS is cloud-oriented, it supports offline functionalities like editing documents and accessing stored files.
Disclaimer
The information provided in this blog post is for educational purposes only. While we strive to ensure the accuracy and reliability of the content, the installation process and compatibility may vary based on your hardware and system configurations. Proceed with caution, and back up your data before making any significant changes to your device. We are not responsible for any issues or damages resulting from the installation of third-party operating systems.
Also Read
Playing EA Sports on Linux: Your Ultimate Guide to Getting Started

