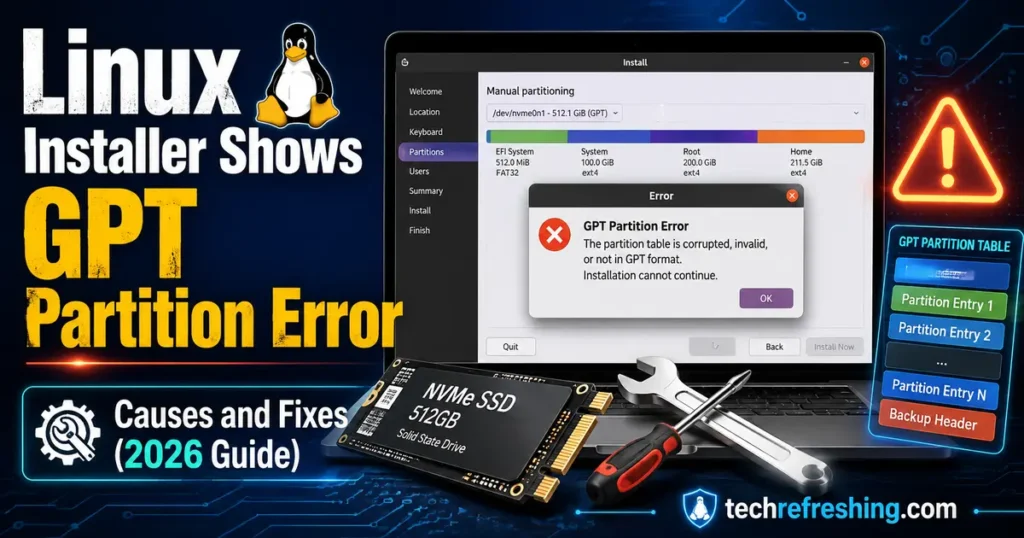
If you’re staring at your screen mid-installation wondering why the Linux installer shows GPT partition error instead of the clean setup wizard you expected, you’re not alone. This is one of the most common roadblocks people hit when installing Ubuntu, Debian, Fedora, Arch, or almost any modern distro on a new SSD, a repurposed laptop, or a dual-boot machine. The good news: it’s rarely a sign of a dead drive. In almost every case, it comes down to a mismatch between how your firmware boots (BIOS/Legacy vs UEFI) and how the disk is partitioned (MBR vs GPT), or a partition table that’s technically broken and needs to be rebuilt before the installer will touch it.
I’ve run into this error more times than I’d like to admit — on an old Dell Latitude that refused to let go of Legacy boot, on a fresh NVMe drive that still had leftover Windows recovery partitions, and once on a RAID controller that simply couldn’t handle GPT on a drive over 2TB. Each case had a different fix. This guide walks through what’s actually happening under the hood, how to diagnose it properly using tools like gdisk, parted, and fdisk, and step-by-step fixes for Ubuntu, Debian, Arch Linux, Fedora, openSUSE, and a few other distros people commonly install in 2026.
What GPT Actually Is (and Why the Installer Cares)
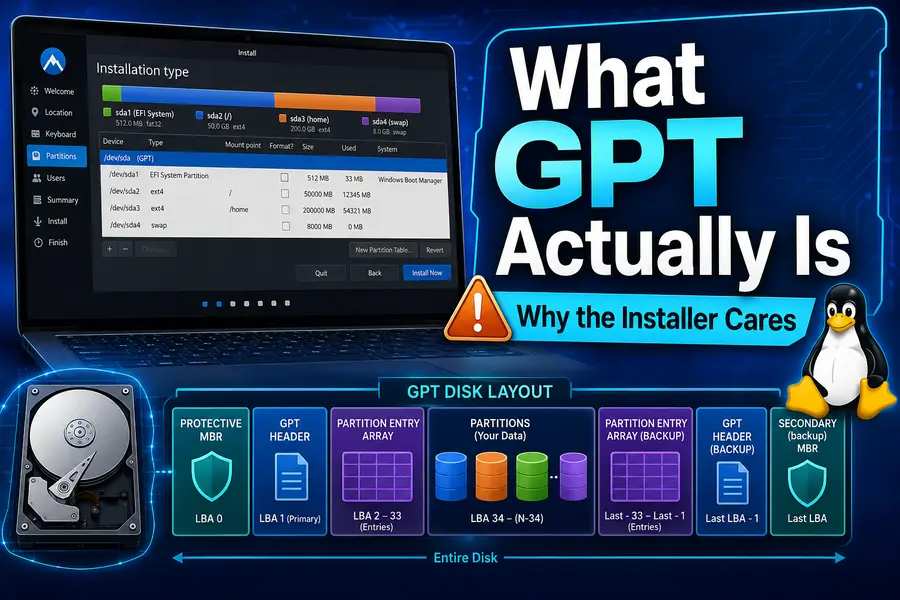
GPT stands for GUID Partition Table, defined as part of the UEFI specification. It’s the modern replacement for the old MBR (Master Boot Record) partitioning scheme, and it’s what almost every 2026-era Linux installer expects by default. GPT supports drives larger than 2TB, allows up to 128 partitions without needing “extended” partition hacks, and — critically — stores two copies of the partition table: one at the start of the disk and a backup copy at the very end. That redundancy is actually one of the reasons GPT errors show up: if either copy is missing, corrupted, or doesn’t match, the installer flags it rather than guessing.
Here’s the part that trips people up: GPT itself isn’t tied to UEFI, even though the two are almost always used together. You can technically run GPT with old-school BIOS boot (using a small BIOS boot partition), and you can run MBR with UEFI on some systems in Compatibility Support Module (CSM) mode. But installers like Ubiquity, Calamares, and Anaconda are opinionated about this pairing for good reason — mixing them wrong is exactly what produces the errors you’re seeing.
Common GPT Partition Errors You’ll See During Installation
Depending on your distro and installer, the wording varies, but they all point to the same handful of underlying problems:
- “Invalid partition table” or “GPT PMBR size mismatch” — the protective MBR doesn’t match the actual disk size, often after resizing a drive or cloning it to a different-sized replacement
- “Your boot partition is on a disk using GPT partitioning but this machine cannot boot using GPT” — a legacy BIOS system trying to boot from a GPT disk without a BIOS boot partition
- “No valid partition table was found” — the disk is uninitialized, blank, or has a corrupted primary GPT header with no readable backup
- “GPT: not present” in gdisk output — the drive still has an MBR table (or nothing at all), and the installer expected GPT
- Anaconda’s “Invalid Disk Label” during Fedora/RHEL installs — same root cause, different messenger
Knowing which message you’re actually looking at saves a lot of guesswork, so before touching anything, boot into a live USB and get a clean read of the disk.
Step One: Diagnose Before You Touch Anything
Every fix below starts the same way. Boot a live USB of your chosen distro, open a terminal, and run gdisk, Rod Smith’s well-documented GPT partitioning tool:
sudo gdisk -l /dev/sdaSwap /dev/sda for whatever your target drive is — check with lsblk first if you’re not sure. The output tells you almost everything:
- If it says “Found valid GPT with protective MBR; using GPT” — the table is fine, and your error is boot-mode related, not partition-table related
- If it says “GPT: not present” but MBR is present — the disk is still MBR, and you likely booted the installer in UEFI mode
- If it says “GPT: damaged” with a note about the primary or backup header failing — you have actual corruption
- If nothing shows up at all — the disk may be entirely blank or have a hardware issue
Also check how you booted the installer itself. Most live USB tools (Rufus, Ventoy, dd, balenaEtcher) let you boot in either BIOS-CSM or UEFI mode, and your firmware boot menu usually labels the USB entry accordingly — look for something like “UEFI: SanDisk USB” versus a plain “SanDisk USB” entry. If you boot the installer in UEFI mode but the target disk is MBR, most modern installers will refuse to proceed cleanly, which is the single most common cause of this whole category of error.
Fix 1: Firmware Boot Mode Doesn’t Match the Disk’s Partition Scheme
This is the number one cause, by a wide margin. Your system’s firmware is set to boot in Legacy/CSM mode, but the target disk is GPT (or vice versa).
How to fix it:
- Reboot and enter your firmware setup (usually F2, F10, F12, Del, or Esc depending on the manufacturer)
- Find the Boot Mode setting — it’s labeled differently everywhere: “Boot Mode,” “UEFI/Legacy Boot,” or “CSM Support”
- If your target disk uses GPT, set this to UEFI only (disable CSM/Legacy)
- If you genuinely need Legacy/BIOS boot (old hardware, specific RAID controller requirements), convert the disk to MBR instead, or add a BIOS boot partition if you want to keep GPT
- Save, reboot into the live USB using the matching mode, and re-run the installer
A quick real-world example: on that Dell Latitude E6430 I mentioned earlier, switching UEFI on in firmware kept silently reverting to Legacy on reboot — a known quirk with some Dell BIOS revisions from that era. The fix there was to fully disable Secure Boot first, then set UEFI mode, save, power off completely (not just restart), and boot cold. Some firmware implementations only commit boot-mode changes after a full power cycle.
Fix 2: Wiping and Rebuilding the Partition Table
If gdisk shows a genuinely damaged or mismatched table, the cleanest fix is usually to wipe it and let the installer start fresh — assuming you’ve already backed up anything important.
Using gdisk:
sudo gdisk /dev/sdaInside gdisk, press x for the expert menu, then z to zap (wipe) the GPT and MBR structures completely. Confirm when prompted. This removes all partition table data — not the files inside partitions, but without a table, the installer will treat the drive as empty and offer to create a new one.
Alternatively, using GNU parted to set a fresh GPT label directly:
sudo parted /dev/sda mklabel gptOr with sgdisk for a fully scripted wipe:
sudo sgdisk --zap-all /dev/sdaAfter any of these, re-run sudo gdisk -l /dev/sda to confirm you now see a clean, valid GPT with no partitions. Then launch the installer again.
Fix 3: PMBR Size Mismatch After Cloning or Resizing
If you cloned a disk to a larger or smaller replacement, or resized a virtual disk in a hypervisor, you’ll often see a “GPT PMBR size mismatch” warning. This happens because the protective MBR still references the old disk’s sector count.
Fix it with parted‘s built-in repair prompt:
sudo parted /dev/sda printParted will detect the mismatch and ask whether to fix the GPT to use the full disk. Answer yes (“Fix”), then confirm the backup GPT should move to the end of the (larger) disk. If you prefer gdisk, simply opening and writing (w) the table with gdisk will also recalculate and repair this automatically, since gdisk always recomputes sizes from the actual device geometry.
Fix 4: Not Enough Free Space for the GPT Backup Table
GPT needs a small amount of free space at the very end of the disk for its backup table (33 sectors minimum, but installers like a bit more headroom). If the last partition runs flush to the absolute end of the disk — common after certain imaging tools or manual dd partitioning — GPT creation or conversion can fail.
Boot the live USB, open GParted, select the last partition, and shrink it slightly (even 10MB is enough) to leave unallocated space at the end of the disk. Apply the change, then retry the installer.
Fix 5: RAID Controllers and Drives Over 2TB in Legacy BIOS Mode
This one shows up mostly on older servers and workstations with hardware RAID controllers (ServeRAID, PERC, and similar). MBR can’t address partitions or starting sectors beyond roughly 2TB, so when the installer creates a boot partition on a large drive under Legacy BIOS, it’s forced into GPT — which BIOS-mode systems can’t boot from without a BIOS boot partition.
Two real options:
- Switch the system to UEFI boot mode if the hardware supports it (most controllers from the last decade do)
- If you’re stuck on Legacy BIOS, manually partition the disk so the boot partition sits within the first 2TB, and add a small unformatted BIOS boot partition (1–2MB) right after it before starting the OS install
Distro-Specific Fix Steps
The underlying causes are universal, but the exact recovery workflow differs a little by installer. Here’s how to handle it distro by distro.
Ubuntu (including Kubuntu, Xubuntu, and Ubuntu 26.04 LTS “Resolute Raccoon”)
See Canonical’s official Ubuntu installation documentation for the full setup walkthrough; the steps below focus specifically on the GPT error.
- Boot the live ISO in the boot mode matching your target scheme (check the boot menu entry — UEFI entries are labeled)
- Open a terminal from the live session, run
sudo gdisk -l /dev/sdato confirm the table state - If needed, launch GParted from the Activities/session menu (it’s included on the Ubuntu live image) to wipe or create a new GPT label under Device > Create Partition Table > GPT
- Re-launch the Ubuntu installer (Ubiquity or the newer flutter-based installer); at the “Installation type” screen, choose Erase disk for a clean pass, or Something else if you want manual control over partitions
- Confirm the boot flag lands on the EFI System Partition (
esp,boot, FAT32, ~512MB) if installing in UEFI mode
Debian (13 “Trixie” and newer)
Debian’s own Installation Guide covers partitioning in depth if you want the full reference.
- Debian’s installer (either the graphical Calamares-based live image or the classic Debian Installer) behaves almost identically to Ubuntu’s underlying logic
- From a live session terminal, verify the table with
gdisk, or drop into a rescue shell (Advanced Options > Rescue Mode) from the classic installer’s boot menu - Use
parted /dev/sda mklabel gptto reset the table if it’s corrupted - In the installer’s “Partition disks” step, choose Guided – use entire disk for a clean automatic layout, which correctly creates the EFI partition when UEFI is detected
- If dual-booting with Windows, make sure the existing Windows EFI partition isn’t accidentally reformatted — the installer should detect and reuse it
Arch Linux
Arch gives you full manual control, so this error usually means you did something out of order during setup rather than the installer failing on its own. The Arch Wiki’s Installation guide and Partitioning page are the most authoritative references for this process.
- Boot the Arch ISO, confirm UEFI mode with:
ls /sys/firmware/efi/efivarsIf that directory exists, you’re in UEFI mode; if it errors out, you booted in Legacy/BIOS.
- Check the disk table:
sgdisk -p /dev/sda- If it’s corrupted or you want a clean start:
   sgdisk --zap-all /dev/sda
   sgdisk -n1:0:+512M -t1:ef00 /dev/sda   # EFI system partition
sgdisk -n2:0:0 -t2:8300 /dev/sda # root partition- Format and mount as usual (
mkfs.fat -F32for the EFI partition,mkfs.ext4or your filesystem of choice for root), then continue withpacstrap - Double-check
bootctl statusor your GRUB install step targets the EFI partition correctly before rebooting
Fedora (43/44 and Anaconda-based installs)
Fedora’s Anaconda installer documentation explains the partitioning screens in more detail than we can cover here.
- Fedora’s Anaconda installer will throw an “Invalid Disk Label” error on the partitioning screen if the disk isn’t GPT and you’re in UEFI mode
- From the live session, open a terminal and run
sudo gdisk -l /dev/sdato confirm - Anaconda’s own partitioning screen has a “Reclaim space” and “I don’t need help; let me partition” option — choosing manual partitioning lets you delete the existing table and create a fresh GPT layout directly in the GUI
- Alternatively, drop to a terminal (Ctrl+Alt+F2 in some Anaconda sessions, or via the live desktop) and run
sudo sgdisk --zap-all /dev/sdabefore returning to the installer and clicking “Rescan Disks”
openSUSE (Leap and Tumbleweed)
- openSUSE’s YaST Partitioner is unusually good at surfacing the real error — check Expert Partitioner > Hard Disks for a clear message about the table type
- If it flags MBR-on-UEFI or a damaged GPT, use the “Create New Partition Table” option within YaST directly, selecting GPT
- Confirm firmware boot mode matches (YaST will warn you explicitly if it detects a mismatch)
Linux Mint
Since Mint is Ubuntu-based, the same GParted-plus-Ubiquity approach applies. The Mint live session includes GParted by default under Administration, so you can wipe and recreate the GPT table before launching the installer from the desktop icon.
Quick Comparison: Fix Approach by Root Cause
| Root Cause | How to Confirm | Fastest Fix |
|---|---|---|
| Boot mode mismatch (UEFI vs Legacy) | gdisk shows valid GPT, but installer still errors | Set firmware to UEFI-only or convert disk to MBR |
| Corrupted GPT header | gdisk reports “damaged,” offers to use backup | sgdisk --zap-all then recreate table |
| PMBR size mismatch (after cloning/resizing) | parted print shows a size warning | Let parted or gdisk auto-fix and rewrite |
| No space for backup GPT table | GPT creation fails at end of disk | Shrink last partition slightly in GParted |
| RAID/Legacy BIOS + disk over 2TB | Installer explicitly mentions GPT + BIOS boot | Switch to UEFI, or keep boot partition under 2TB with BIOS boot partition |
| Disk completely blank/uninitialized | gdisk/parted show no partition table at all | Create a new GPT label directly in the installer or with parted |
A Few Things Worth Backing Up First
Every fix above that involves gdisk -z, sgdisk --zap-all, or “Create New Partition Table” is destructive to the partition table — and while your files often survive briefly on disk after a table wipe, recovering them afterward is unreliable and not something to count on. If there’s any data on the target drive you care about, image it first with dd or copy files off using the live USB’s file manager before running any of the wipe commands. This is doubly true if you’re not 100% sure which physical drive /dev/sda actually refers to — always cross-check with lsblk -o NAME,SIZE,MODEL,SERIAL before pointing a zap command at it.
Wrapping Up
Most of the time, when the Linux installer shows GPT partition error, it’s not because your hardware is failing — it’s a mismatch between firmware boot mode and disk layout, a leftover corrupted header from a previous OS or cloning job, or a table that’s simply missing the small amount of space GPT needs for its backup copy. Run gdisk -l first, match your boot mode to your intended partition scheme, and use sgdisk, parted, or GParted to rebuild the table cleanly when needed. Once the disk and firmware agree with each other, Ubuntu, Debian, Fedora, Arch, and every other major distro installer in 2026 will walk through the rest of the setup without complaint.
FAQ
Can I convert a GPT disk to MBR without losing data?
Not safely with standard tools — converting between GPT and MBR typically requires wiping the partition table, so back up your data first.
Does every UEFI system require GPT?
No, but it’s strongly recommended; most UEFI firmware can technically boot MBR disks via CSM/Legacy mode, though modern installers assume GPT for UEFI installs.
Why does gdisk show “GPT: not present” even though I used GPT before?
This usually means the disk was reformatted with MBR since then, or the GPT header got overwritten by another tool or OS installer.
Is it safe to zap the partition table with sgdisk?
Yes for the table itself, but it removes all partition entries, so any data you want to keep must be backed up beforehand.
Will dual-booting Windows and Linux cause GPT errors?
It can if Windows was installed in Legacy/MBR mode and you try to install Linux in UEFI/GPT mode on the same disk — both operating systems need to agree on the same boot mode and table type.
Disclaimer: This guide is provided for informational purposes only. Partitioning commands like sgdisk, gdisk, and parted can permanently erase data if used incorrectly. Always back up important files before modifying a partition table, and proceed at your own risk. Steps and terminology may vary slightly depending on your distro version, hardware, and firmware vendor.